Follow these steps
Complete the workflow, then verify it
- 1
Start a notification Flow
Choose New Flow, then the review-notification task and App Store as the source.
- 2
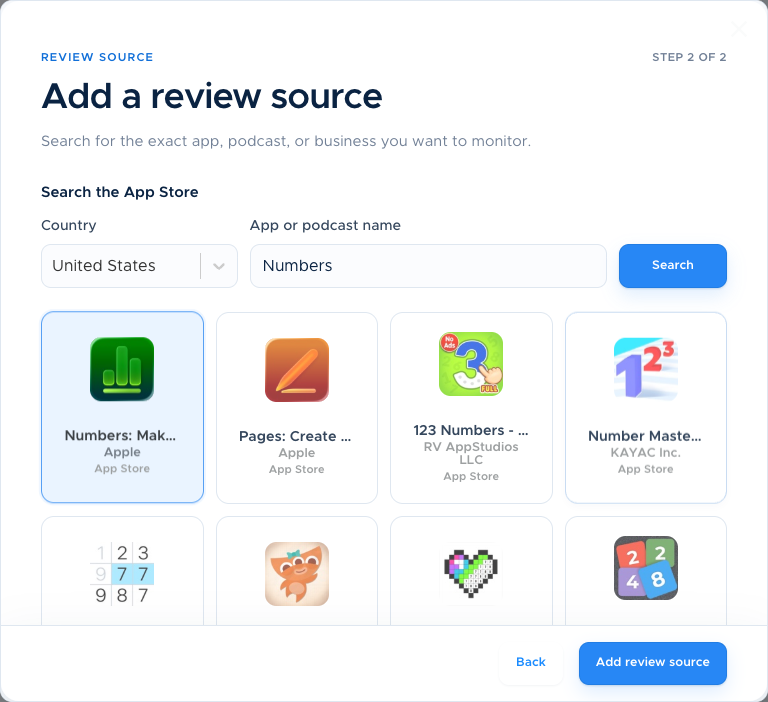
Find the public listing
Search for the app and confirm the iOS or Mac listing and developer. Ordinary public-review monitoring uses a public listing; you do not need an App Store Connect or Google Play developer account. Publishing replies and Google Play complete-ratings reports have separate authorization requirements.
- 3
Choose a destination
Connect the Slack workspace, helpdesk, Teams destination, or email address that should receive this app’s reviews.
- 4
Choose scope and ratings
Select one country and the star ratings to deliver. All available scope enables Global Scanning. Translation is another optional add-on. There is no release-version or topic filter.
- 5
Save and check delivery
Saving a Flow sends a setup/introduction message to its destination. This confirms the connection; it is not a sample customer review. Check a naturally arriving matching review separately. There is no separate Send test alert button in the current Flow menu.
Quick checklist
- ✓The public listing is the intended app.
- ✓The selected country and ratings match the review you expect.
- ✓Destination setup message received.
If something does not work
The app is missing+
Confirm the listing is public and the correct store is selected. Contact support with the public listing URL if search still fails; reconnecting a developer account is not the ordinary monitoring fix.
Setup works but reviews are missing+
Check that the review is new, in the selected scope, and matches the star ratings. Source availability can delay delivery. Send support the Flow name and public review context.
Frequently asked questions
Can I monitor multiple apps?+
Create a separate Flow for every listing and destination.
Are rating totals the same as written reviews?+
No. Ratings can exist without review text. Google Play complete-ratings reports require a separate authorized data connection; public-review monitoring does not include every star-only rating.